Follow our installation guide to start using GlitchTip.
1. Login or create an account
To access Elestio, you will need to connect to your existing account or create a new one. We provide 4 ways to connect to your account:
- Github
- Gitlab
MFA is enable by default for new accounts created with an email address. A code is sent to your email address every time you connect to your account.
2. Create a new GlitchTip service
Once you are logged in, go into the Services section and click on Deploy my first service or Create a new service if your project already contains other services.
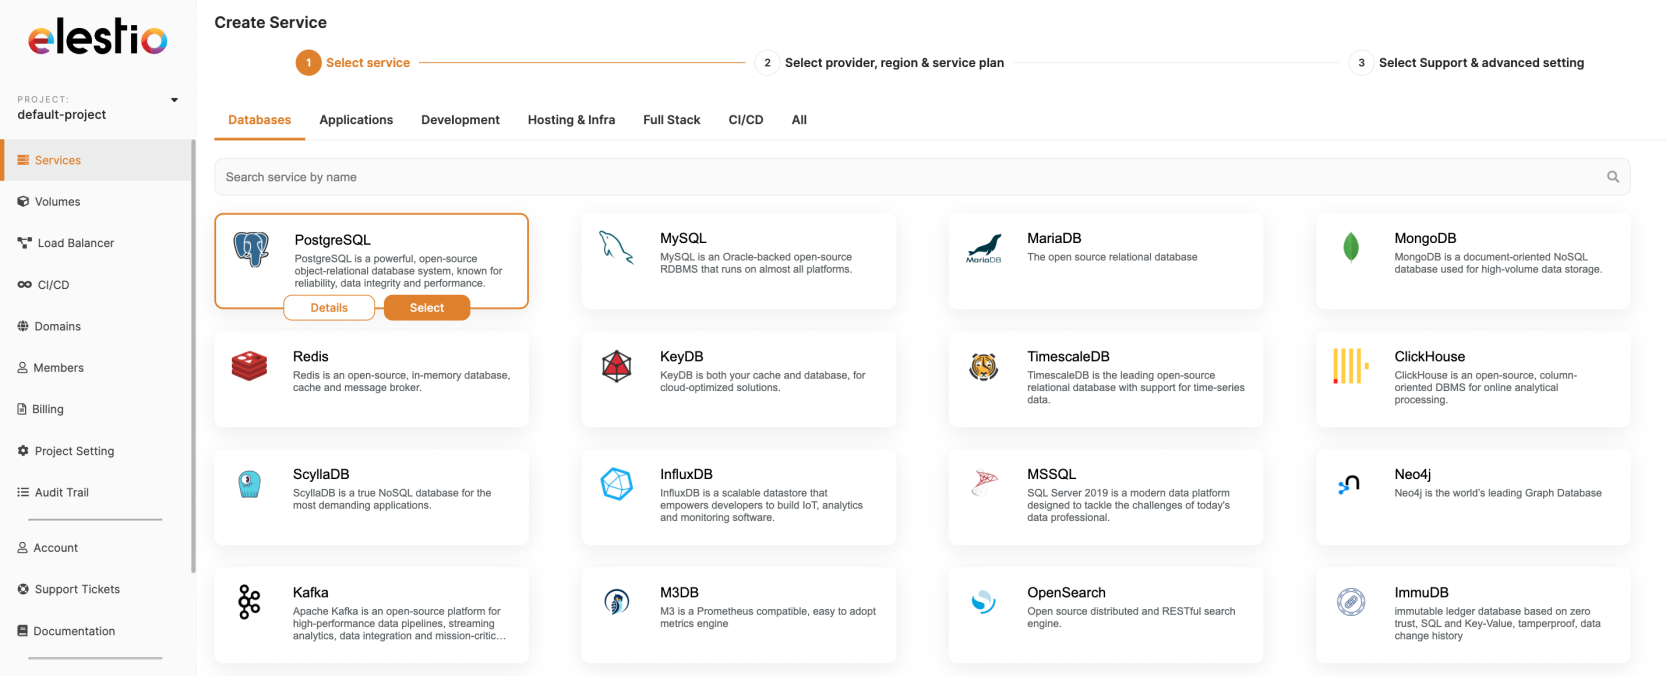
Type GlitchTip in the search bar and click on the select button.
3. Hosting
Elestio is not a hosting provider. We provide a fully managed service hosted on the cloud provider of your choice. You can choose between Hetzner, DigitalOcean, Amazon Lightsail, Linode, Vultr, and Scaleway. For those cloud providers, we take care of everything, you won't be charged by the cloud provider nor need to create an account with them.

If you want the resources to be created on your own cloud provider account, you can choose between Amazon AWS or even your own server.
Each cloud provider has multiple regions. A region is a geographical area where the data centers of a cloud provider are located. Choose your region based on your location, the location of your users, and the location of any connected services to get the lowest latency.
4. Instance resources
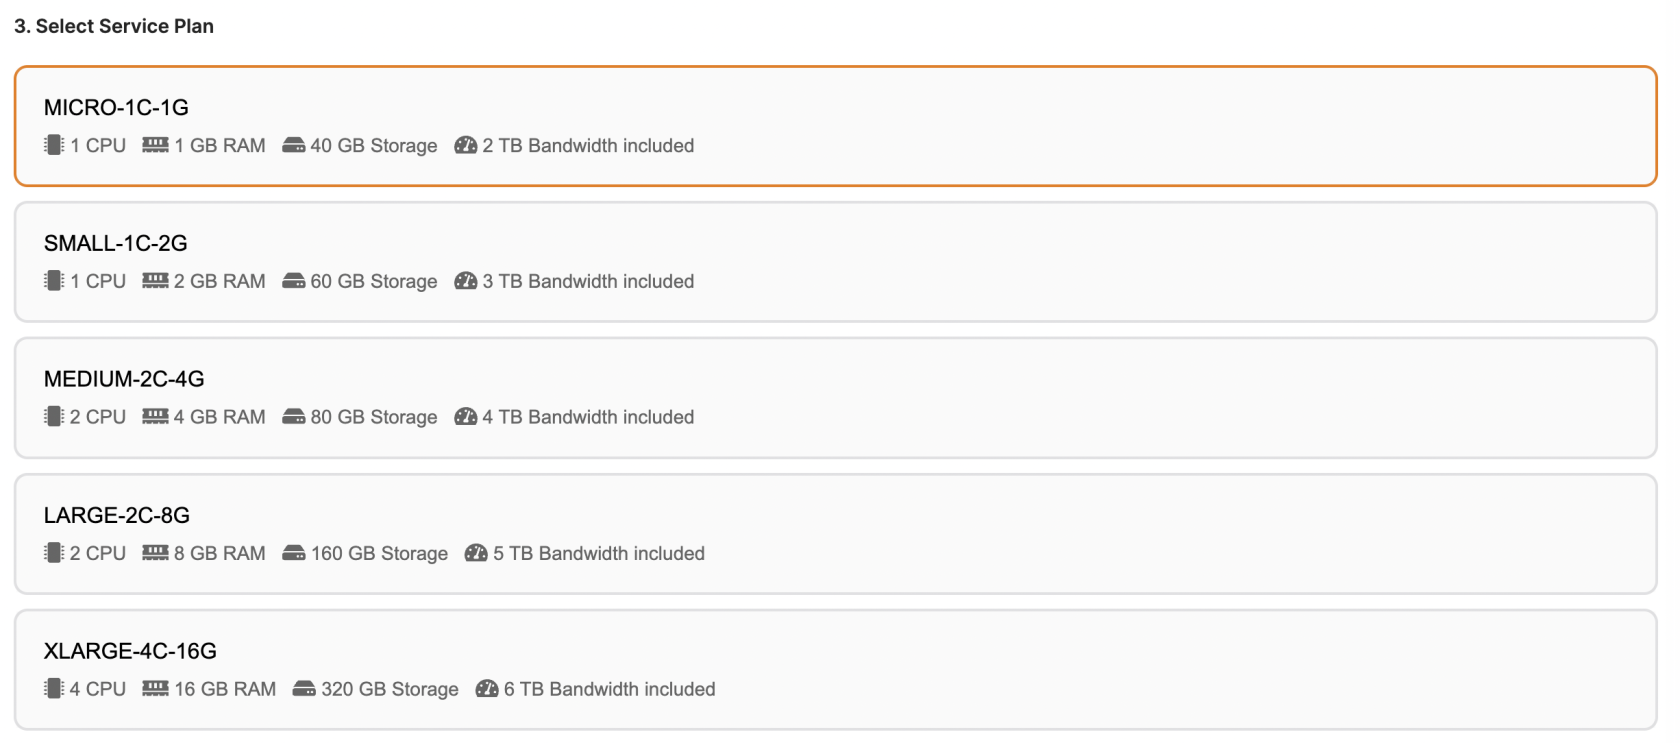
Based on the cloud provider you chose at the previous step, you will be able to choose between different instance types. Each instance type has different resources (CPU, RAM, storage, etc.).
If you don't see the lowest performance instance type for GlitchTip but saw it on another service, it means that the instance type is too small to run GlitchTip. We made it so you can't choose an instance type that would give you a bad experience with GlitchTip.
Some cloud providers have ARM-based instances. ARM-based instances are usually cheaper than x86-based instances for the same performance and more energy-efficient. That's usually the best cost-performance ratio you can get. (and it's better for the planet 🌍)
5. Support plan
If you need any help to use GlitchTip or our services, Elestio support team is here to help you.
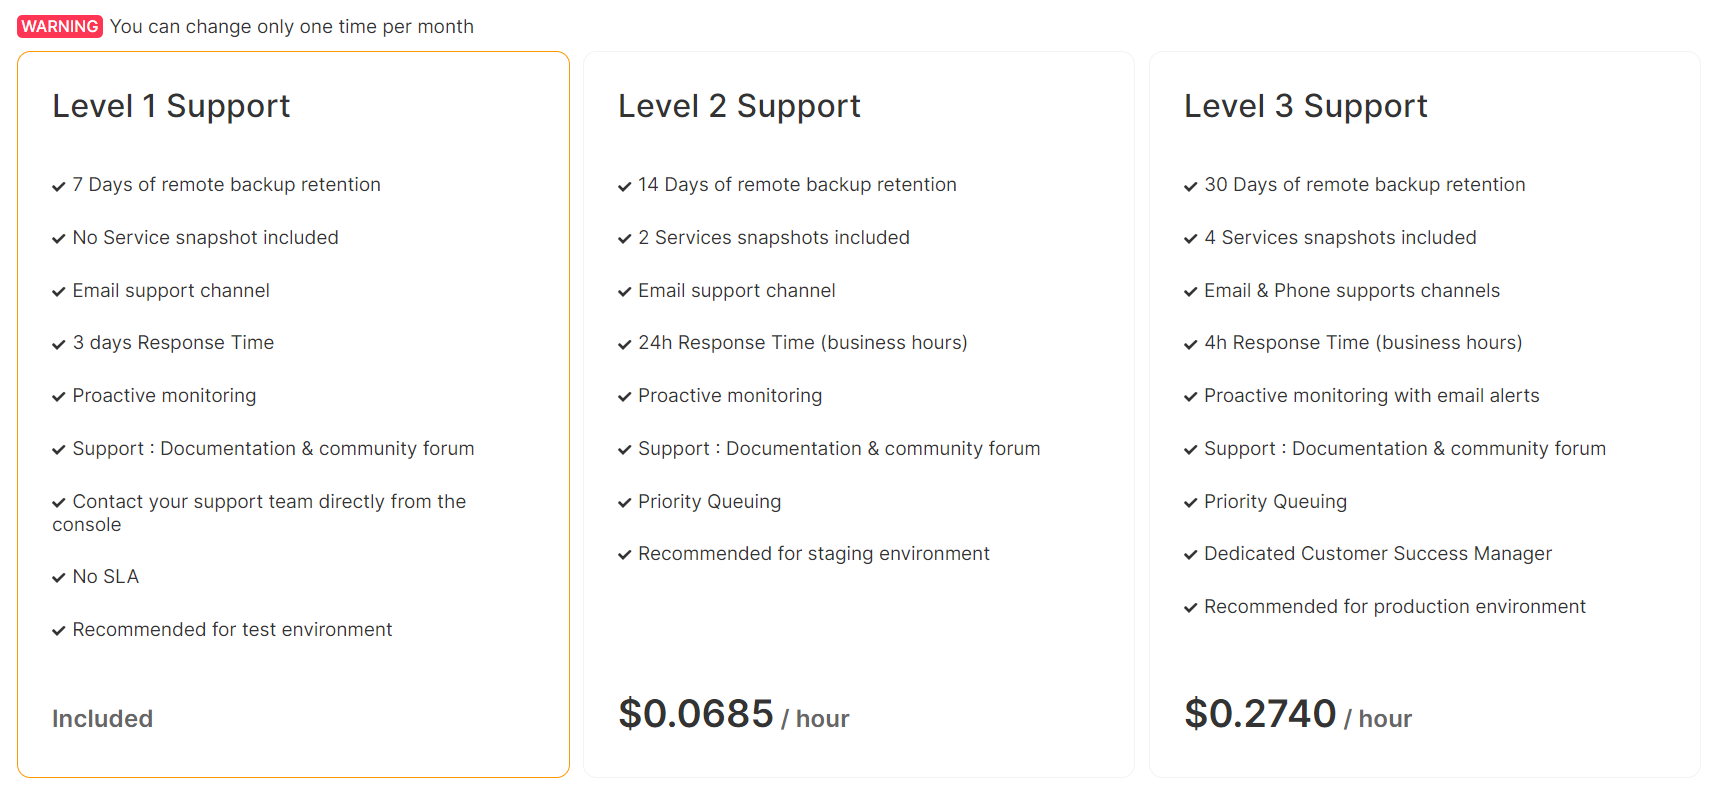
The first level of support is included in the price of the service. It includes:
- 7 days of remote backup retention
- Documentation & community forum
- Email support channel
- 3 days response time
- Proactive Monitoring
- Tickets submission
6. Advanced settings
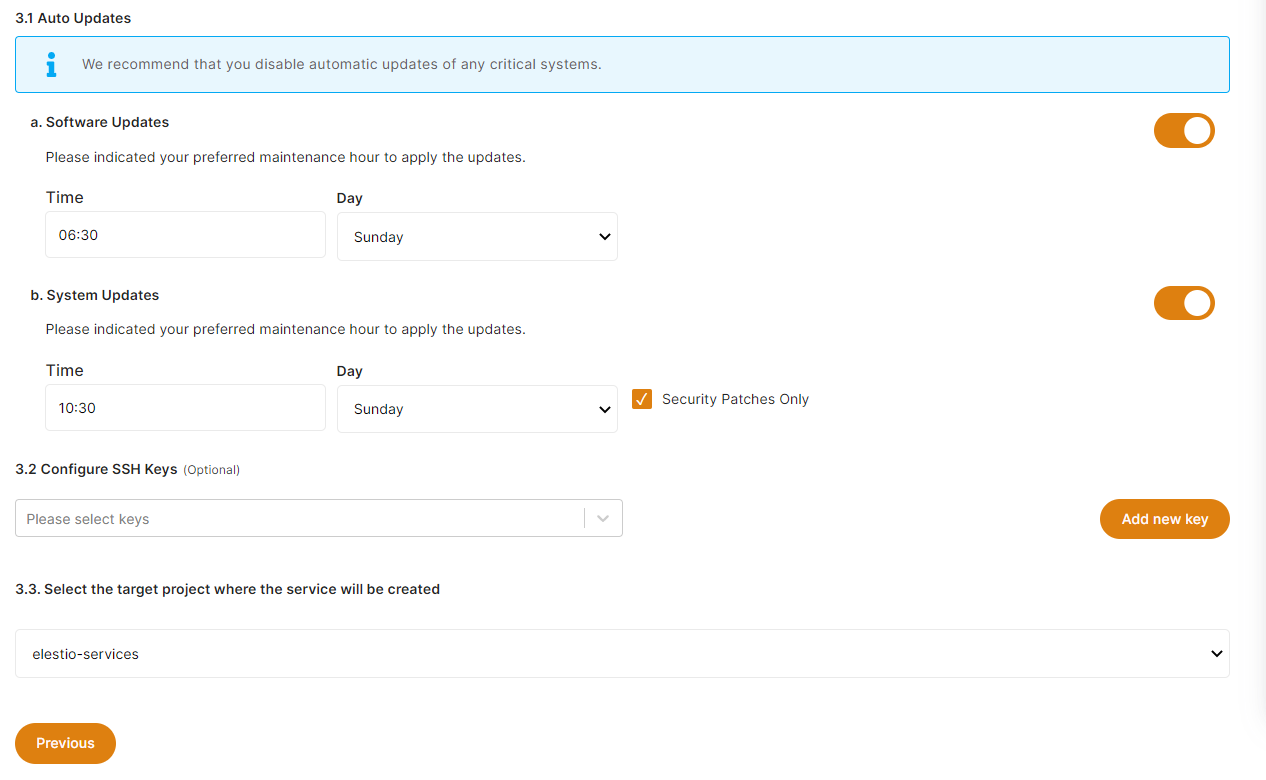
You can override the name of your service, the moment when we will update GlitchTip if a new version is available, and the moment you want to perform system updates.
You can choose a specific version of GlitchTip to install. By default we always install the latest version.
Those steps are optional.
7. Review and launch
On the right sidebar you can review your choices. Your estimated monthly price is displayed. This is an estimation because if you delete the instance before the end of the month, you will only be charged for the total of hours your instance was running.
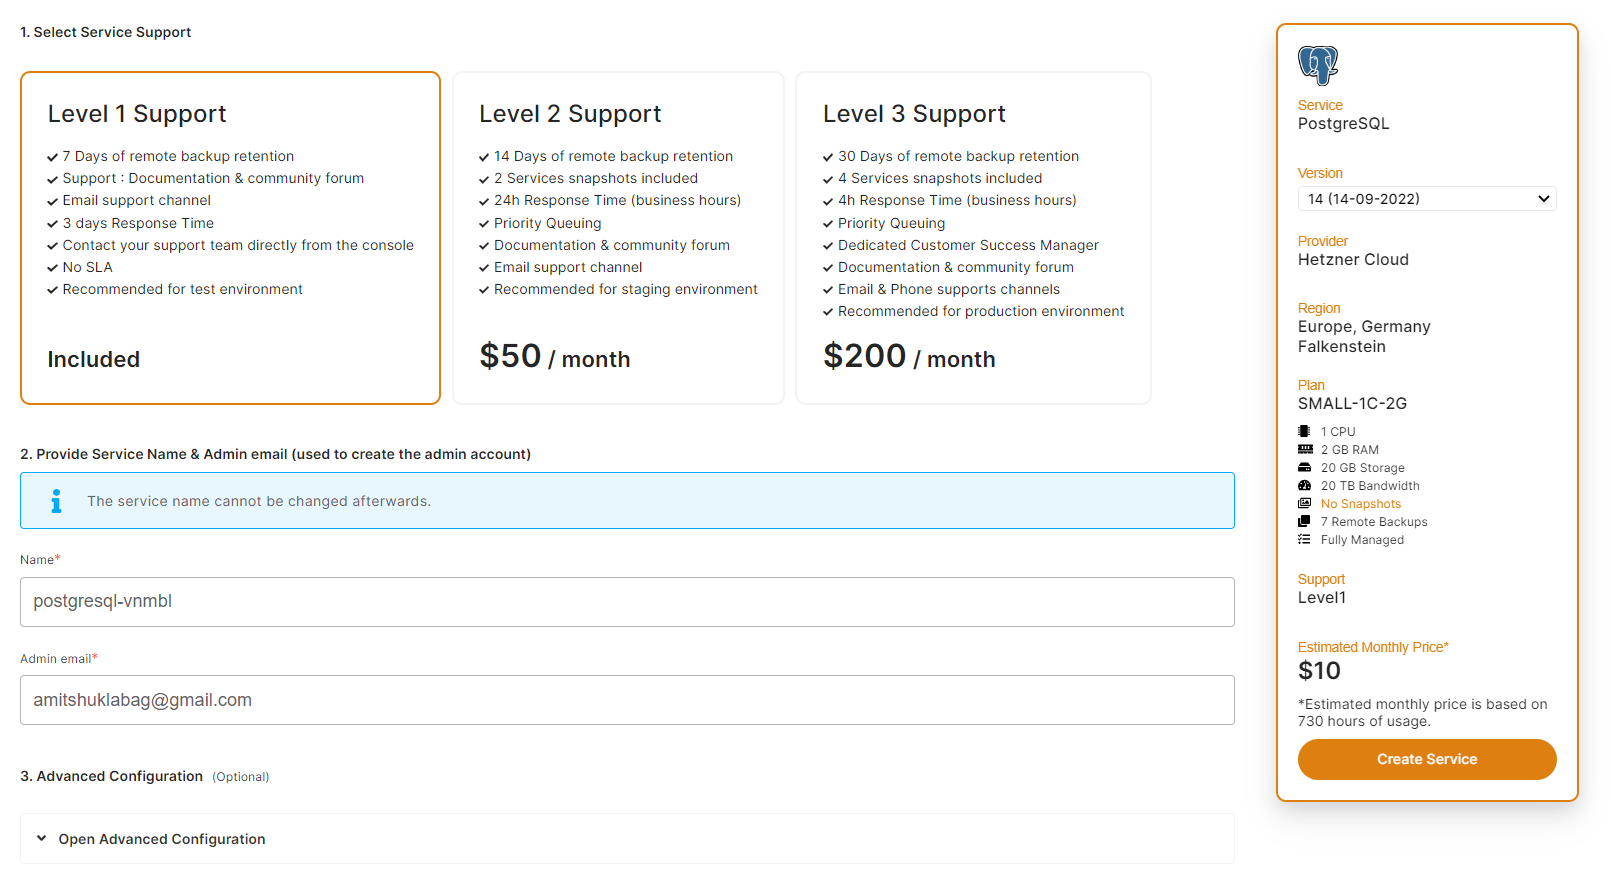
Once you are ready, click on the Create Service button. We will create the instance and install GlitchTip on it.
8. Start using GlitchTip fully managed on Elestio
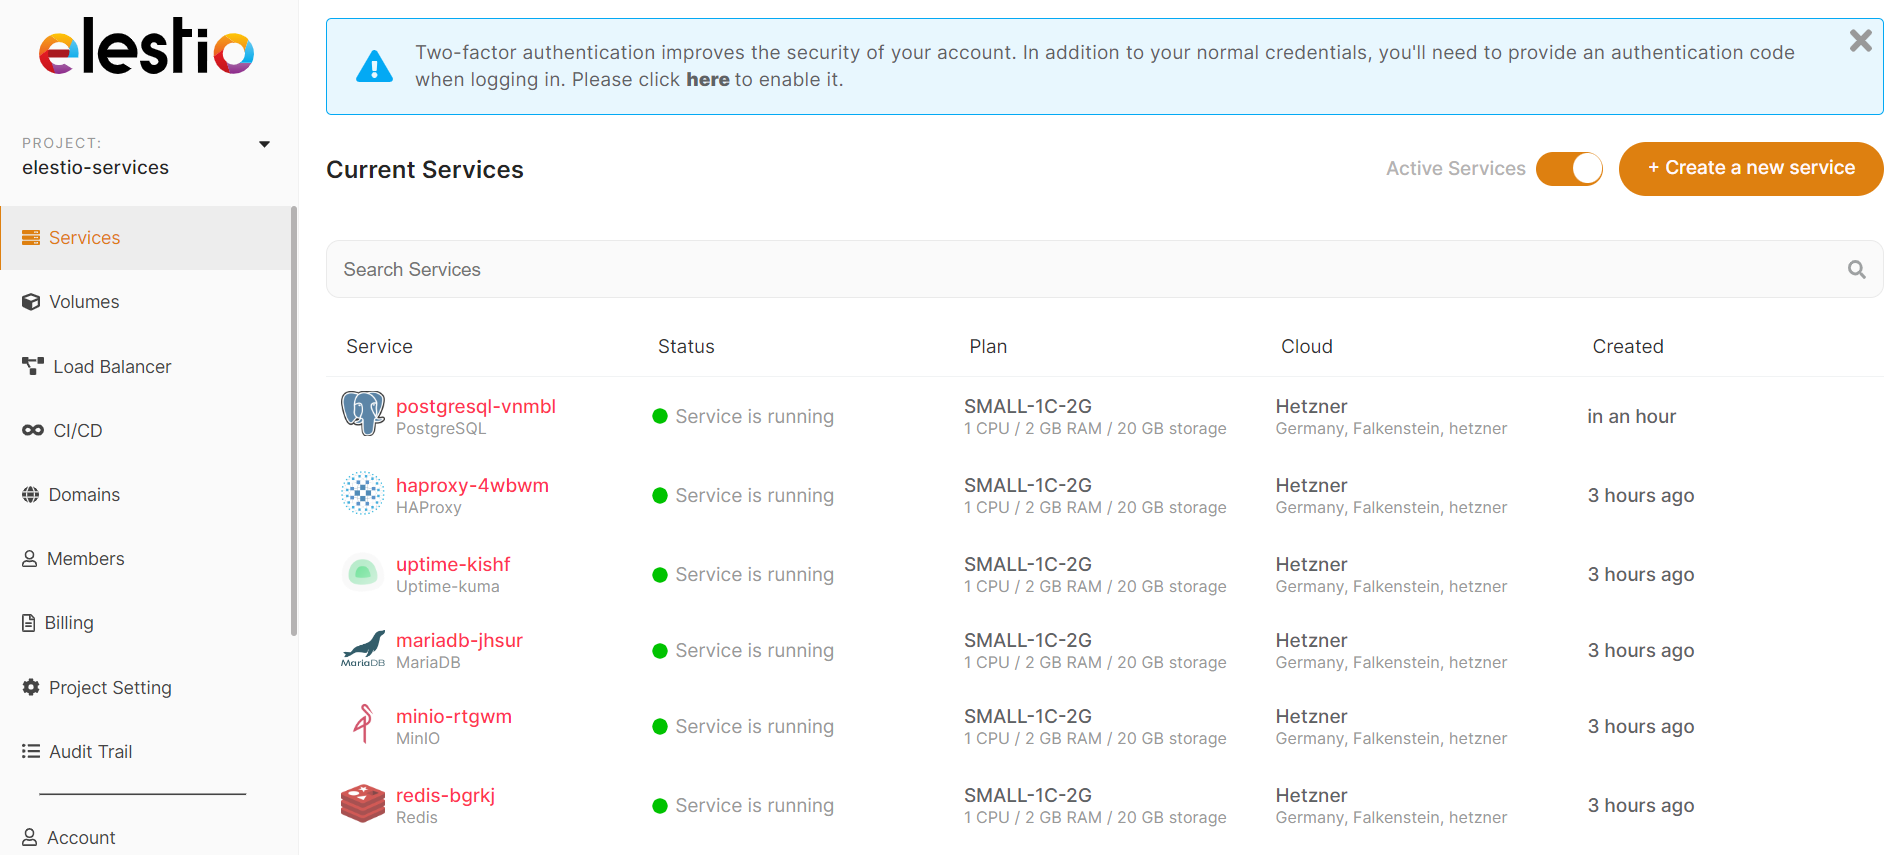
Once everything is ready, you will see a green dot next to your GlitchTip service. You can click on it to access the Elestio administration dashboard.
From there you can get the link and credentials to access your freshly deployed GlitchTip instance.