ArchiveBox is a self-hosted internet archiving tool that allows you to collect, save, and view websites offline. It provides a solution for archiving web content privately, making it suitable for personal or organizational use. Whether you need to save browser bookmarks, preserve evidence for legal cases, or back up photos and media from various platforms like Facebook, Instagram, Flickr, YouTube, and Soundcloud, ArchiveBox is a reliable choice for web content archiving.
Sign In
On your first visit to the site, you will be presented with the login/signup screen.

When your instance is first created, an account is created for you with the email you chose. You can get the password for this account by going to your Elestio dashboard and clicking on the "Show Password" button.
Enter your email, name and password and click the "Sign In" button
Adding to Archive
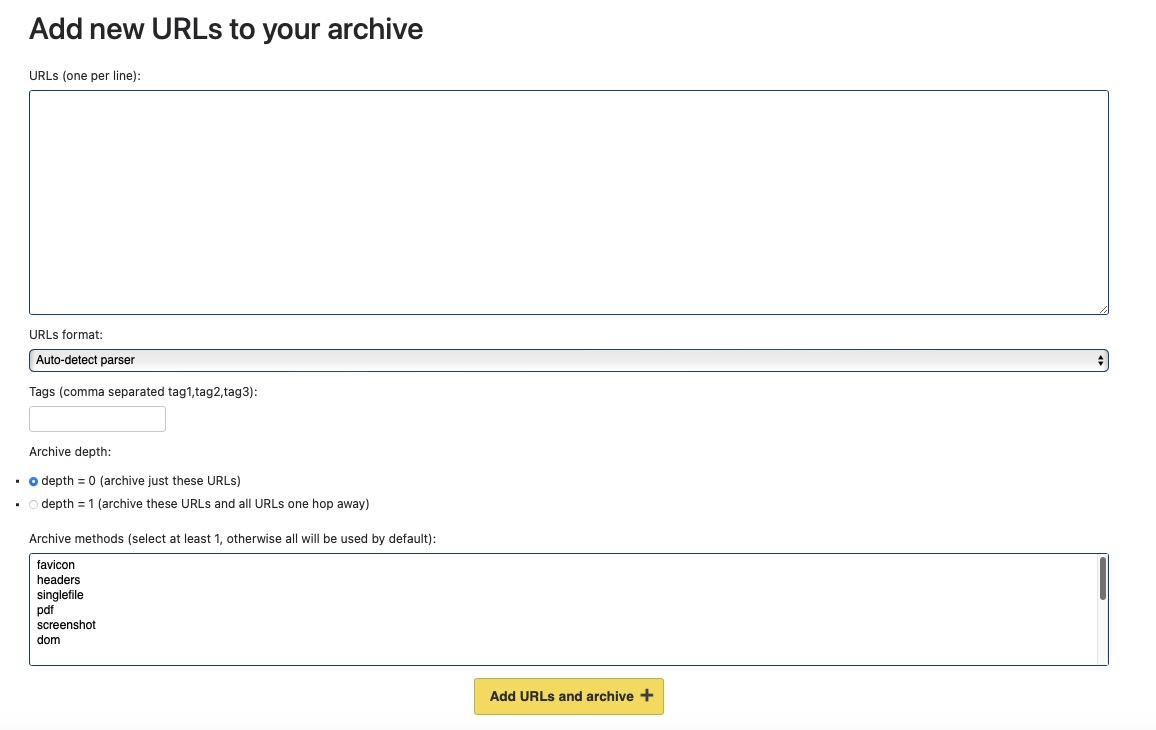
Adding URLs to your archive is essential for preserving web content. Multiple URLs can be added simultaneously by placing them on separate lines. ArchiveBox automatically detects and parses the provided URLs. To facilitate future navigation and retrieval, tags can be assigned to the archives.

Adding Archive Result
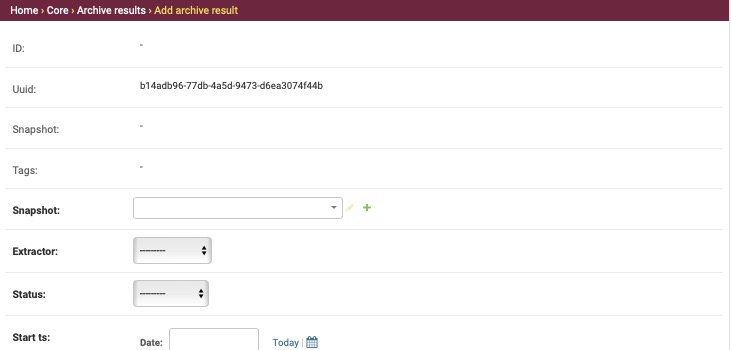
Adding archive results to ArchiveBox is an easy process. The snapshot can be uploaded or added, the extract can be configured, and the status can be updated. Additionally, start time slots and other settings can be included to ensure the accurate addition of results to your ArchiveBox instance.

Adding Tag
Tags are very useful in organizing and categorizing archives. By creating tags, you can easily group related archives together. In the tag section, simply click on "Add tag" to create a new tag. Provide a descriptive name and choose a suitable slug for the tag. Saving the tag will allow you to conveniently view and manage all your tags in one place.

Adding User
Working in a team? You can invite your team members by providing their email address and providing them with the appropriate role. Roles helps in restricting the access to the functionalities a user can perform. You can add your team members to different groups and configure User permission. Give a username to your user and click on "Add User"
